
Learn how to navigate zones in Garena Free Fire
After dropping on the map in Free Fire, your first thought may be to find as much loot as possible. But the first thing you need to make sure is that you are safe, and in order to maintain safety, you need to know about Zones. Every once in a while, a small circular area of the map will appear denoting a zone. Each zone will offer you a different experience, and we'll help you navigate them.

Red Zone
The red zone is the most directly dangerous zone you can find yourself in. Around 10 seconds after the zone appears, bombs will start dropping, and if one hits you, it's an instant trip back to the main menu. Luckily, there's one major line of defense against the red zone's bombs, and it's as simple as walking through a door.
The bombs can only hurt you if you’re standing out in the open, so as long as you're in a building with a roof, you will be completely safe. Even then, keep your guard up as there might be another player hiding in the same building as you. But at least in a building you won't have to worry about your elimination literally falling out of the sky.
Green Zone
Green zones pose a direct threat to your in-game health, but they take a slower approach. As soon as the green circle appears on the map, a poisonous gas will appear, and anyone within will slowly take damage over time at a rate of about five health points per second.
If you’re stuck in a green zone with little to no health, you'd better hightail it out of there ASAP. But if you're at full health or close, you’d better just stay put. The gas doesn't stick around long enough to take your entire health bar away, and it could give you the jump on enemies who weren’t expecting anyone to have remained in the zone.
Orange Zone
The orange zone does not directly damage you when it appears. Sounds great, right? Unfortunately, this doesn't mean the orange zones aren't dangerous, they just go about their threats a different way. In an orange zone, a drone flies over and exposes the position of every player within. Uh-oh.
The dangers of orange zones depend on how you play the game. If you're stealthy, having your position exposed is the worst-case scenario, so be sure to avoid them at all costs. However, if you prefer an offensive strategy, the orange zone will give you a heaping helping of potential targets, so go rack up those eliminations. Either way, be wary of an orange zone popping up.

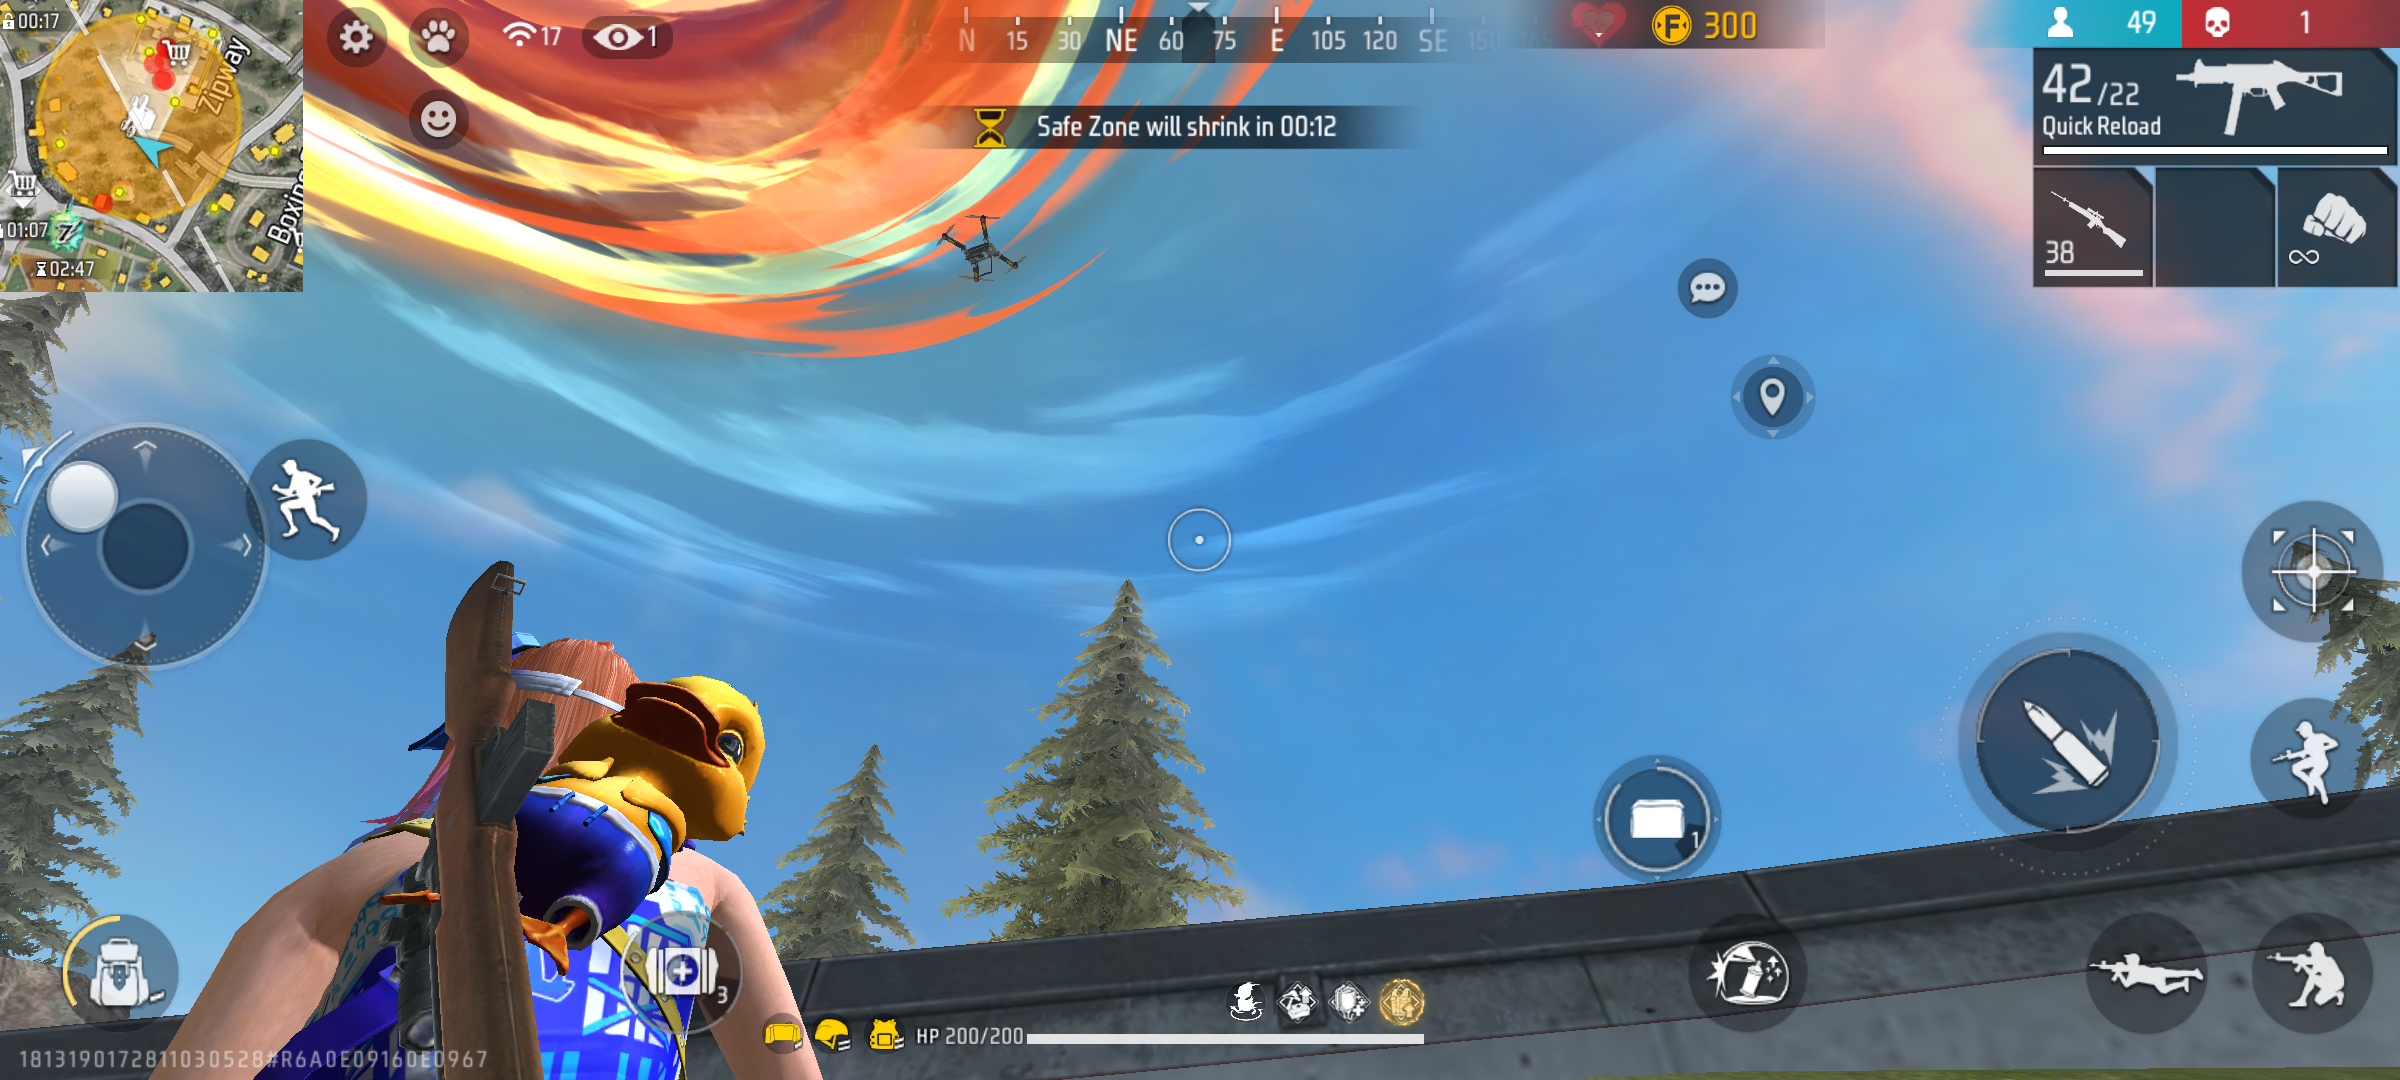
Safe Zone
This is the most prevalent "zone" in Free Fire, and it's the one you need to stay in to remain in the game. As the other zones close in, the safe zone will continually shift, and you'll need to keep an eye on where you are within the safe zone – and if you're not in it, how far you have to go to get back into it before time runs out.
Most of the time, you'll be able to manage without much issue. The game does a good job of reminding you when the safe zone will shrink, while the map on the in-game display draws a line with the shortest distance between you and the zone to follow. However, if you're on the outskirts of the map looking for loot and the timer goes off, you'd better get a move on!
Blue Zone
Finally we have the Blue Zone - a shrinking safe zone that denotes high loot areas.
While the zone itself doesn't pose any dangers, your opponents can see the zone too and will likely show up for the loot, creating an instant hotspot. Watch your back while loot-hunting. If you can be the last one standing in the Blue Zone, the rest of the match should go smoothly thanks to your enhanced arsenal.

Free Fire: 8th Anniversary!
Garena International I
In-app purchases
4.2star
124M reviews
1B+
Downloads

Mature 17+
info